

How To Draw The Male Figure
Figure drawing is a fundamental skill for artists, simply i of the hardest to truly master. In this article, I explain my personal procedure and offering some advice to aid you improve your figure drawings.
On this folio we'll walk through how to describe a female figure. Jump to page two for a pace past step guide to drawing male person figures, or page 3 for a closer await at gesture cartoon.
Although having noesis of the proportions of a human figure is important, comport in mind that these are only a guide. Trying to shoehorn every person you draw into an 8-head-high platonic is a shortcut to uninspiring figure drawing.
To achieve style we need to work with gesture, the spirit of the pose, the fluid nature in line. If we take gesture besides far, though, our drawing will look wobbly. To counter that we need to also piece of work with a solid structure, but as well much structure can make for a strong drawing. Therein lies the keen balancing deed of figure drawing that we will explore here.
For a more basic guide, see how to draw a person .
Above you lot tin watch one of my-depth video tutorials where I explore how to get the nearly from references. For footstep-by-stride written instructions on how to depict a female person figure, read the tutorial beneath.
After more than drawing tips? Take a look at our guide to how to describe pretty much anything, or bank check out our essential advice on foreshortening in art or even these charcoal drawing tips. Alternatively, get yourself kitted out with the best pencils effectually.
With that out of the way, let'due south get started on how to draw the female person figure…
Click the icon in the top right of each image to enlarge it.
01. Showtime with simple shapes
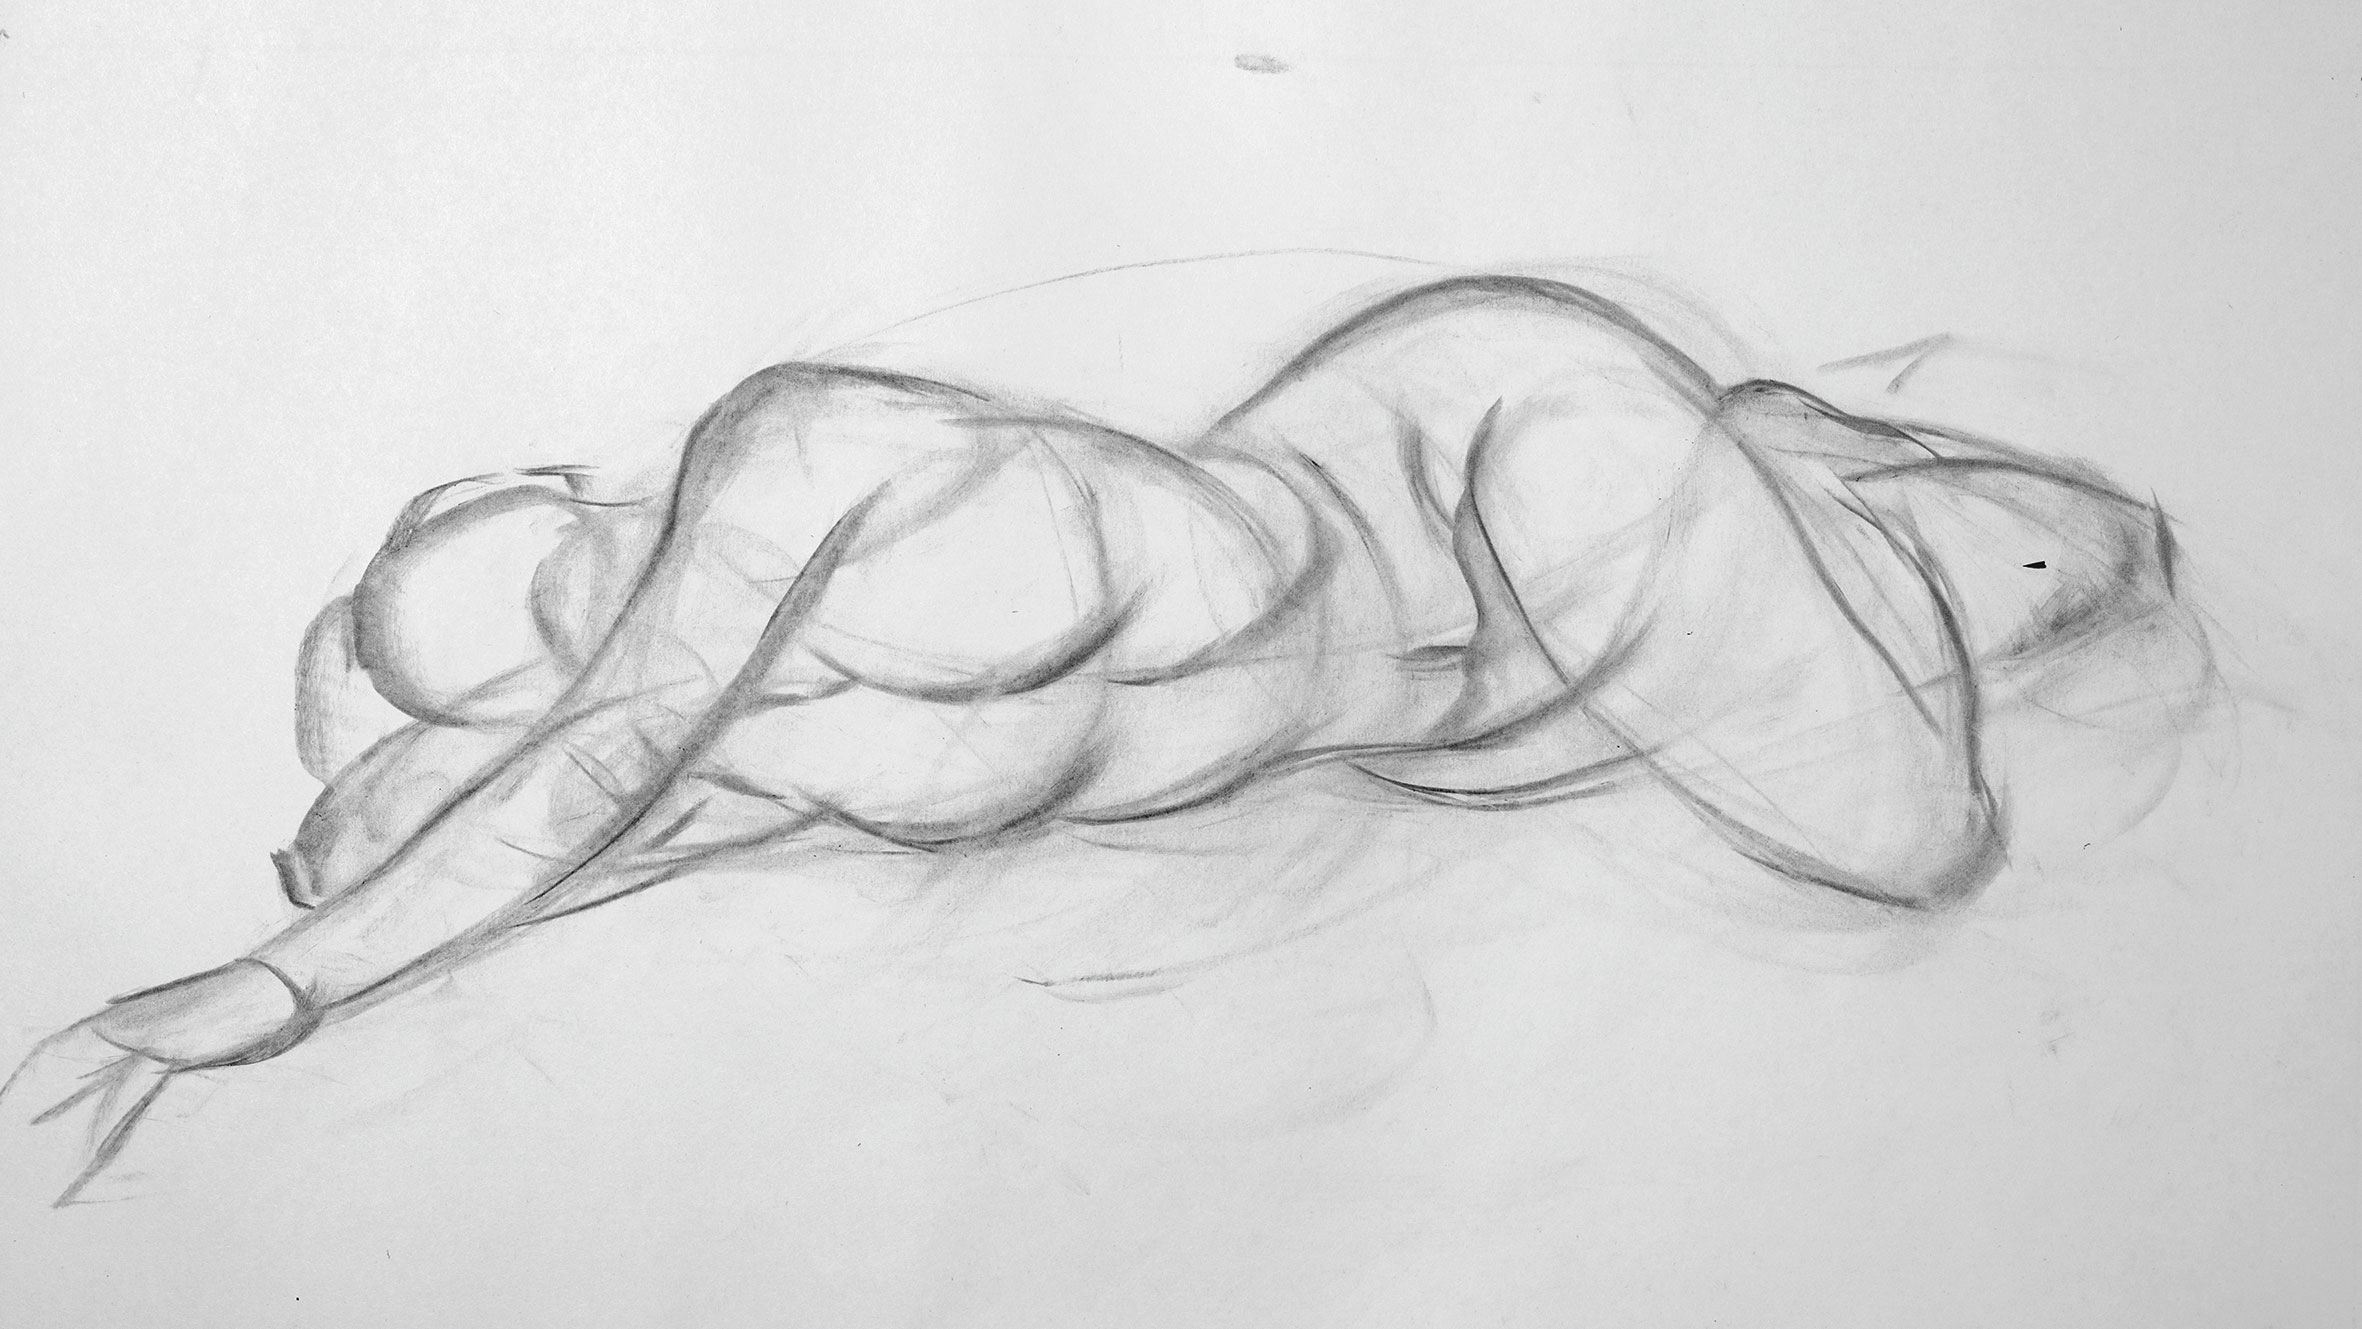
Start with your attention level gear up to loftier. I use a small, two-finger wide piece of charcoal for my initial sketch. Depict the bones proportions, making whatsoever adjustments required – especially if you lot're working from a photo.
02. Add more sophisticated lines
Starting your figure drawing with bones shapes makes it easier to describe more sophisticated lines on height. Here, I've drawn the face using pocket-sized shapes inside a large shape. This is two of my disciplines in action at once: big to small; and simple to sophisticated.
Note the gestural grip in action. Drawing with our gestural manus enables usa to use the rhythm of our arm rather than our stiff wrist to make our marks. Information technology gives the states the freedom to draw long fluid lines on the paper (for more advice, see this article on how to hold a pencil correctly).
03. Exaggerate the curves
I'm constantly analysing the photograph reference. On closer inspection, what appears to exist a human foot is actually the ankle twisting. I decide to draw the classic shape of a human foot to make the drawing more articulate. I'k improving what I observe in the photo in terms of artistic marking-making. Note how many times I exaggerate the curves to make the drawing more lively.
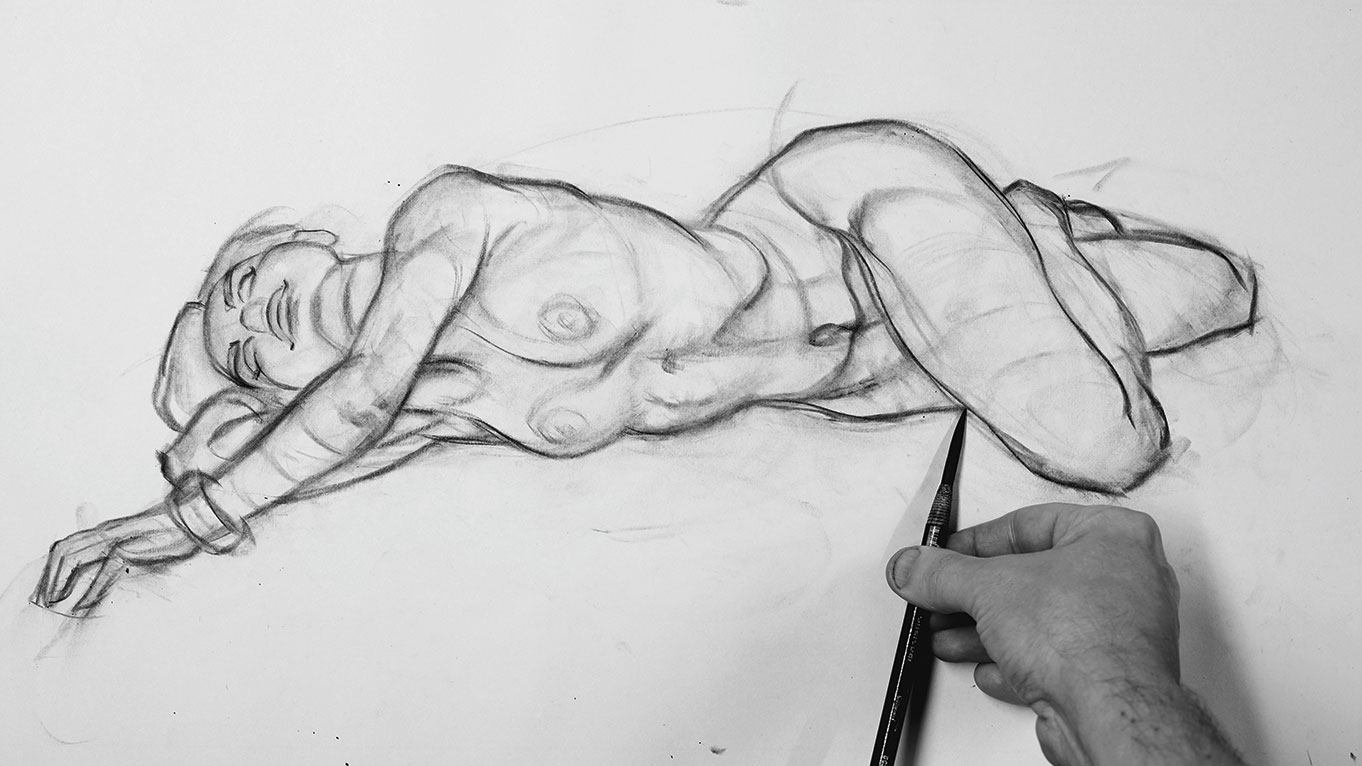
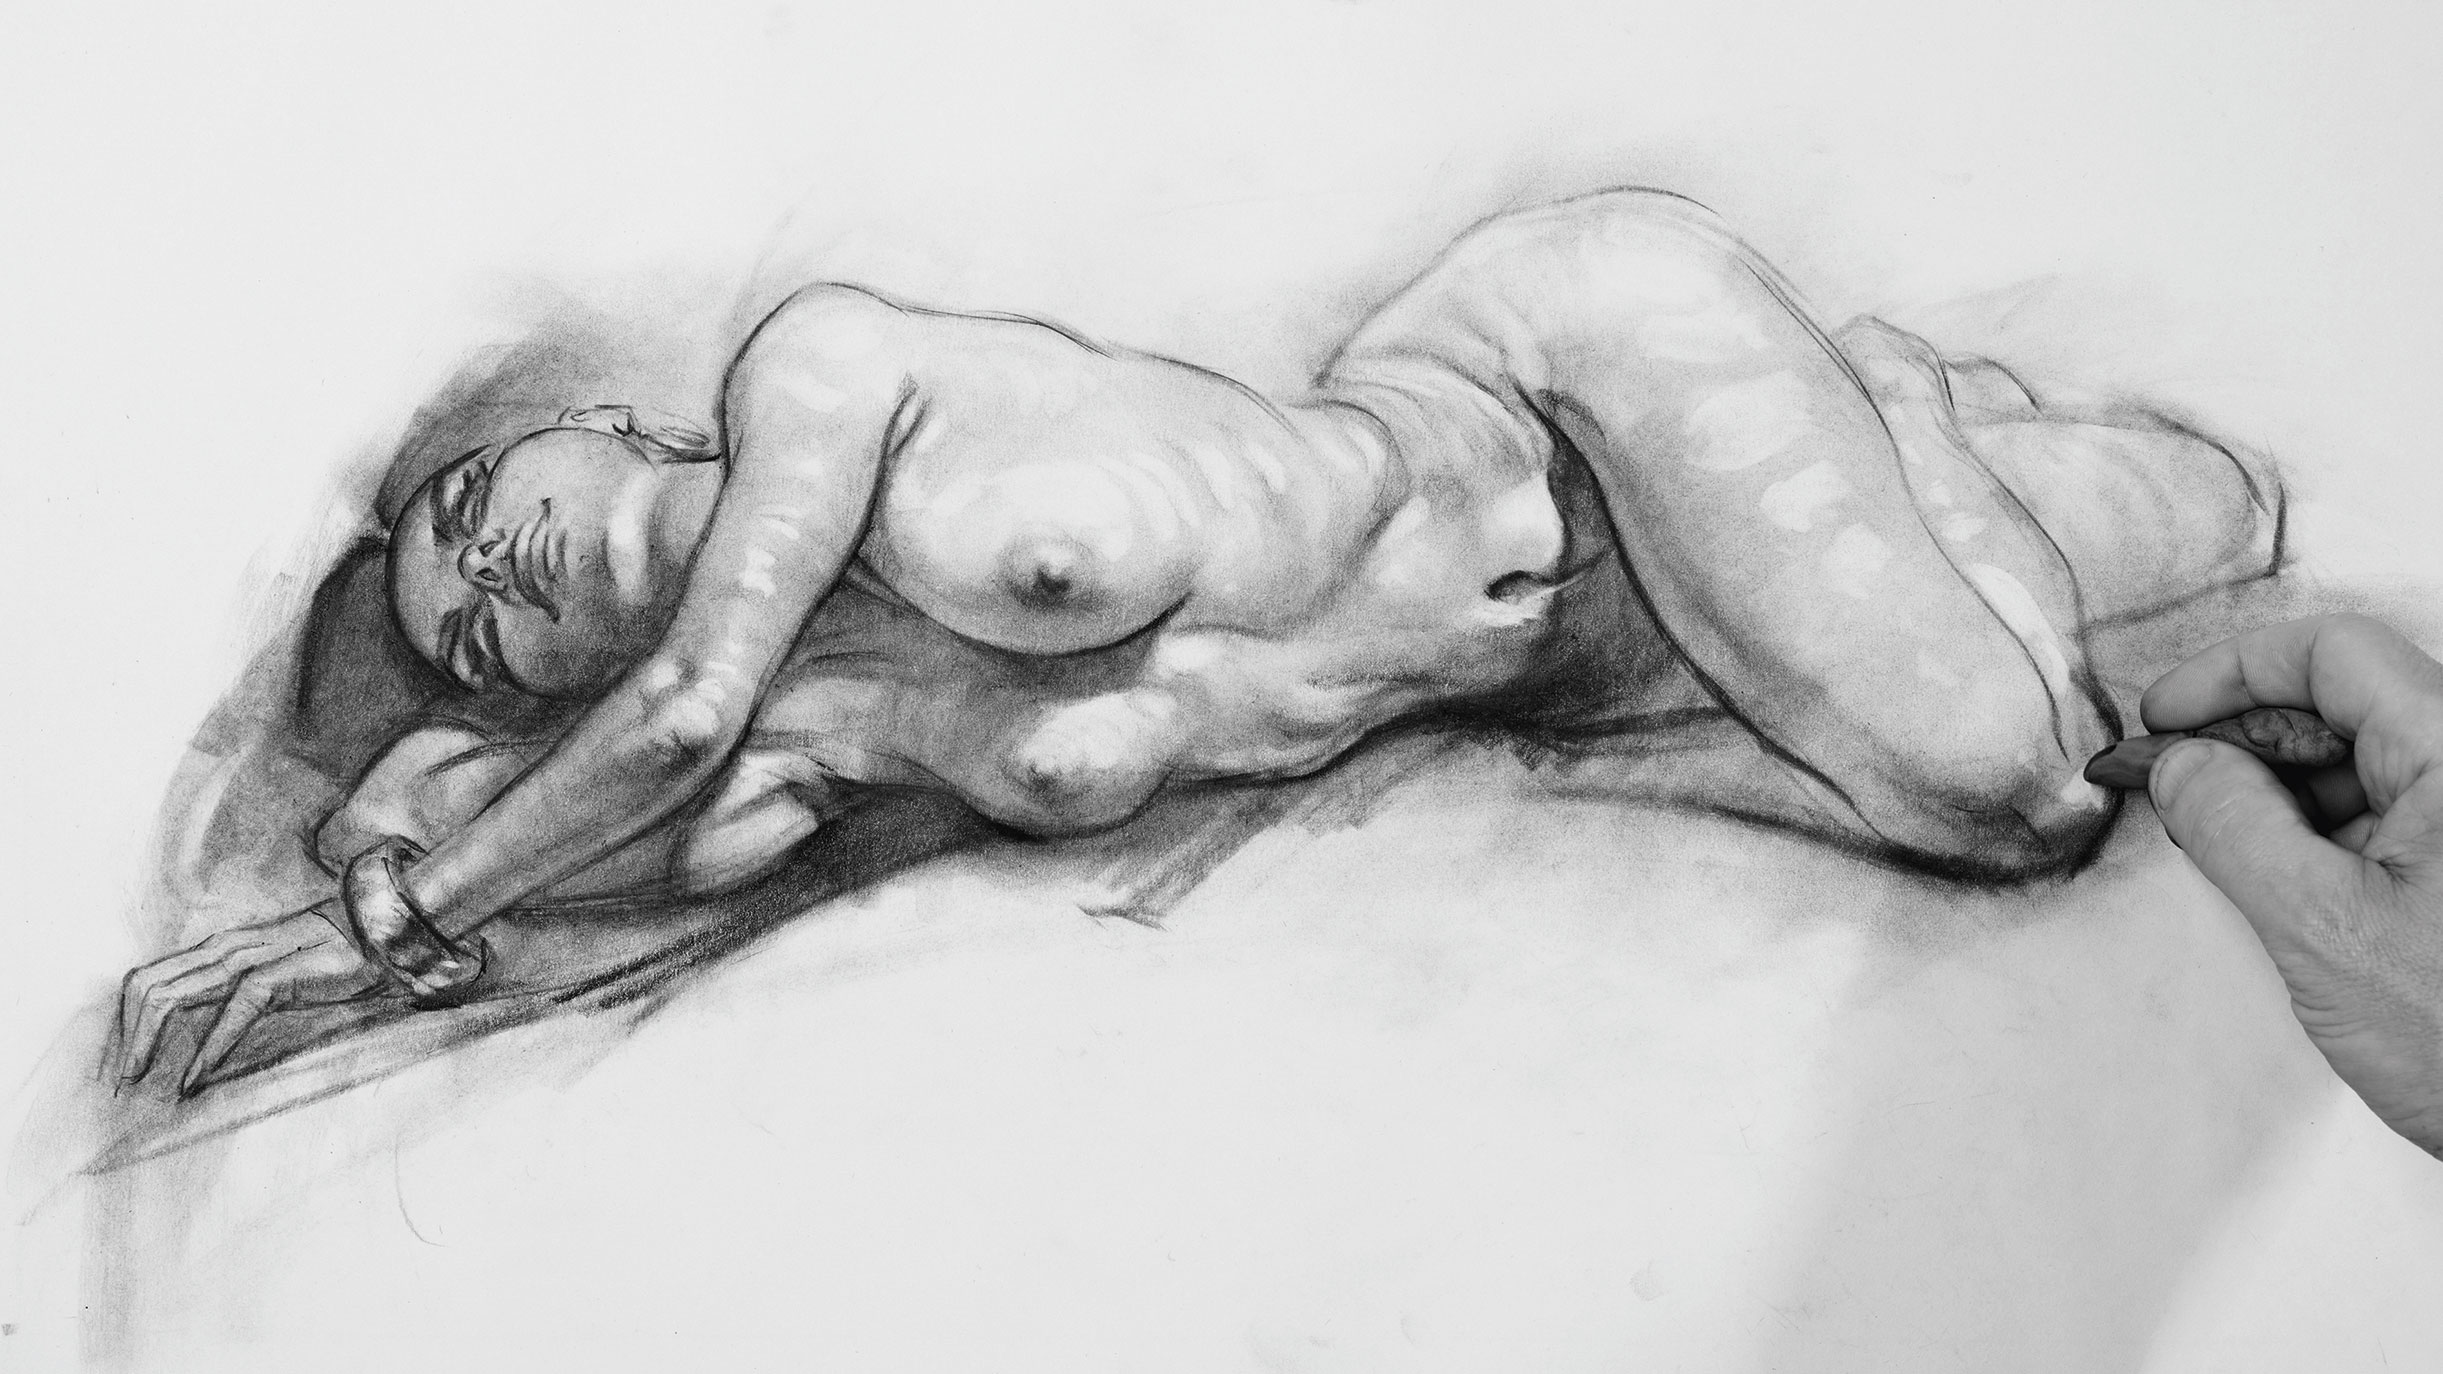
04. Lay in broad tones in charcoal
At this stage I footstep back from the art to cheque the cartoon has solid structure. I lay in broad tones with my charcoal. Remember, our goal here is to interpret the reference. If we gauge success on how close nosotros copy, we'll stop upwardly with a stiff drawing that looks like a distorted photograph.
05. Blend tone into form
Up until now I've juggled gesture with structure. It's an okay drawing, only nada stylish. This is the journeyman stage, from which we can stamp our own style. Using tissue, I blend tone into form, this also fades the drawing and gives me a second chance to draw better on pinnacle.
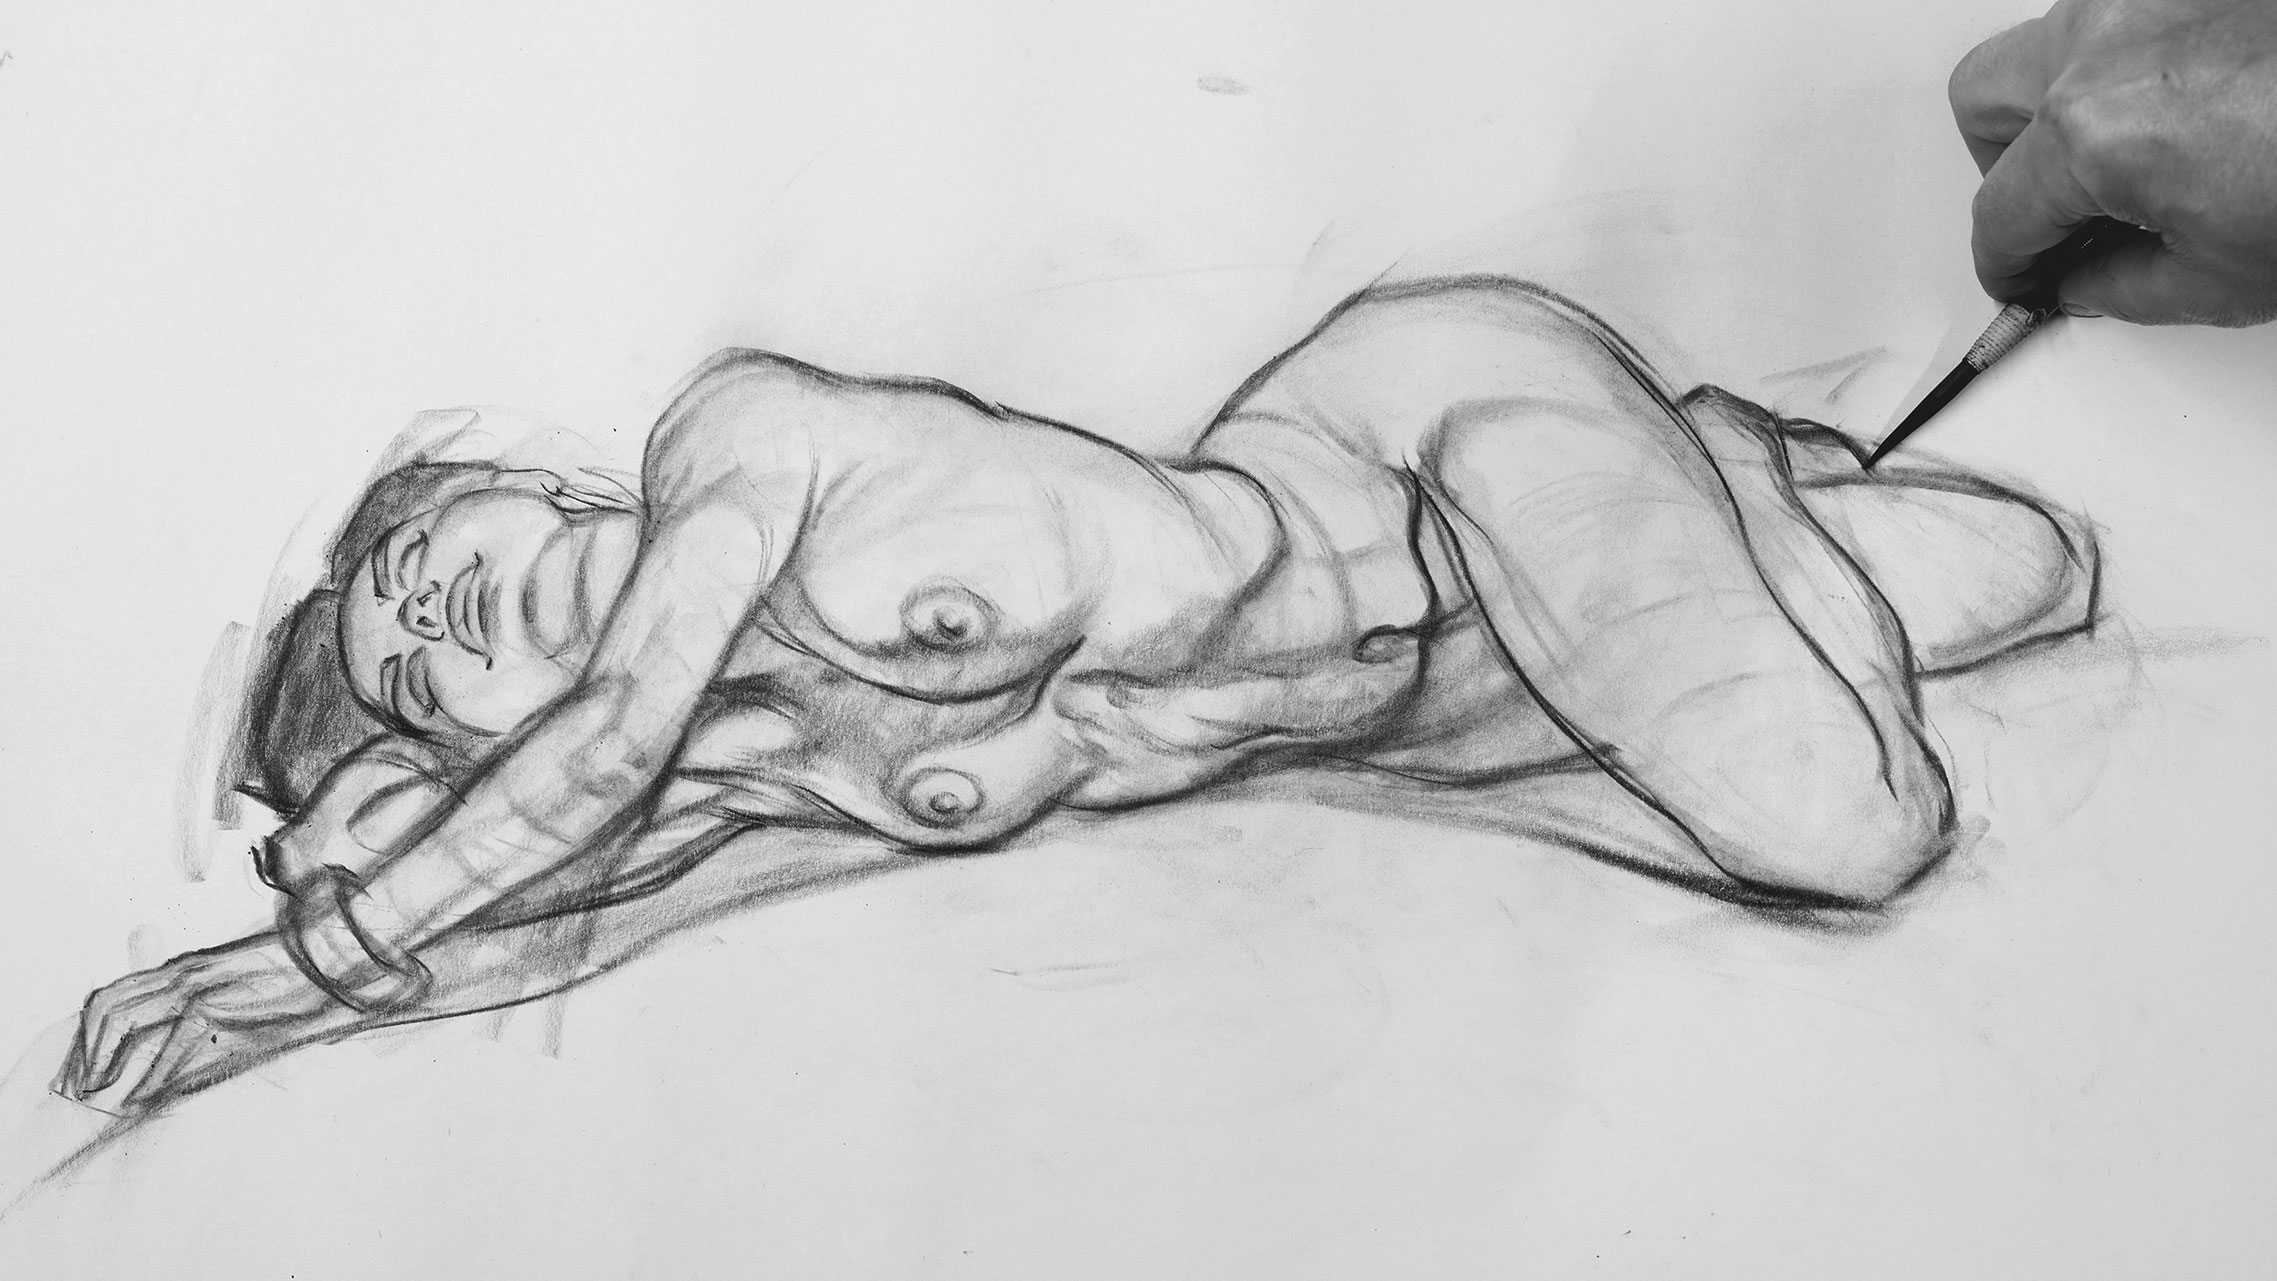
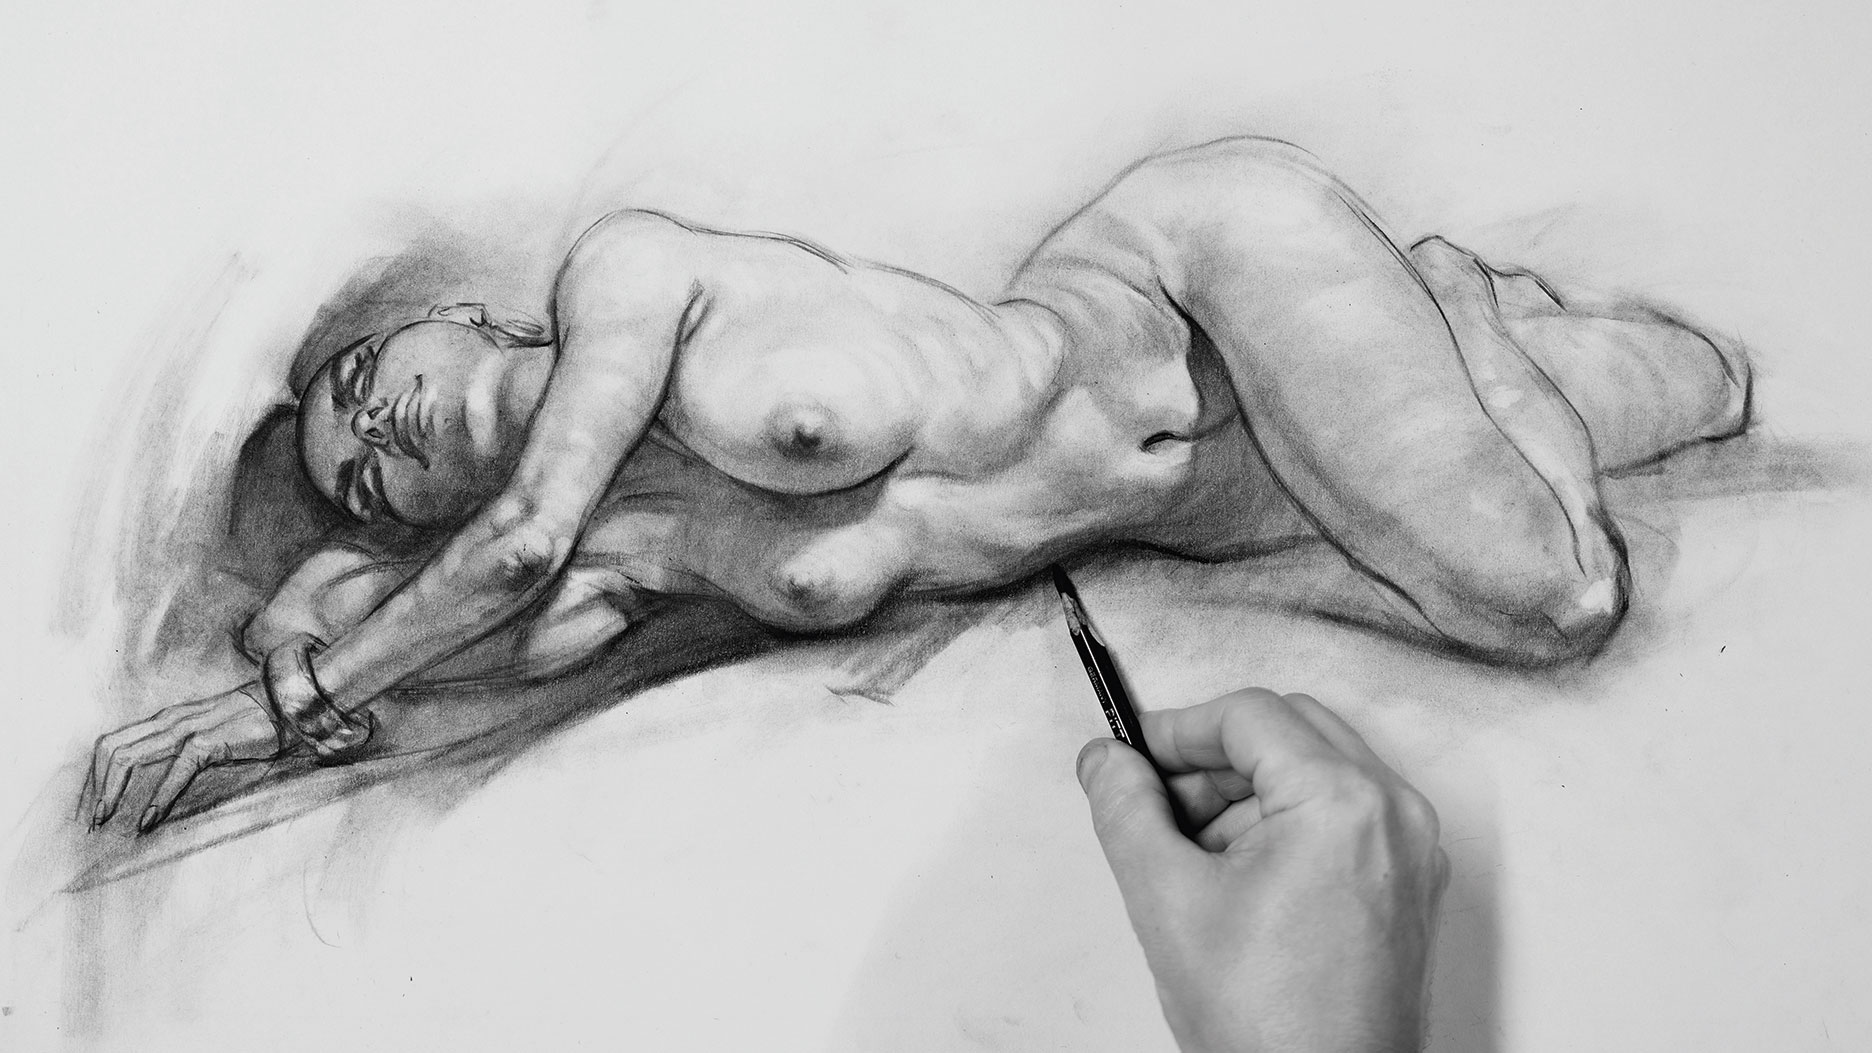
06. Add more tonal gestures
Here I'm making modest structural adjustments and calculation more tonal gestures. This second fourth dimension around goes rapidly – just a matter of minutes, which is a small investment for an hr-long drawing. From this point onwards, my quest is to further explore style in the drawing.
07. Recollect, if it looks wrong, information technology is wrong!
I use shadows to push the gesture, but omit the shadow of the xiphoid procedure (the minor bone under the pointed curvation of the ribcage). It looks odd here. Fifty-fifty though it's correct, it violates one of my art laws: If it looks incorrect, it'due south wrong, even if it's right!
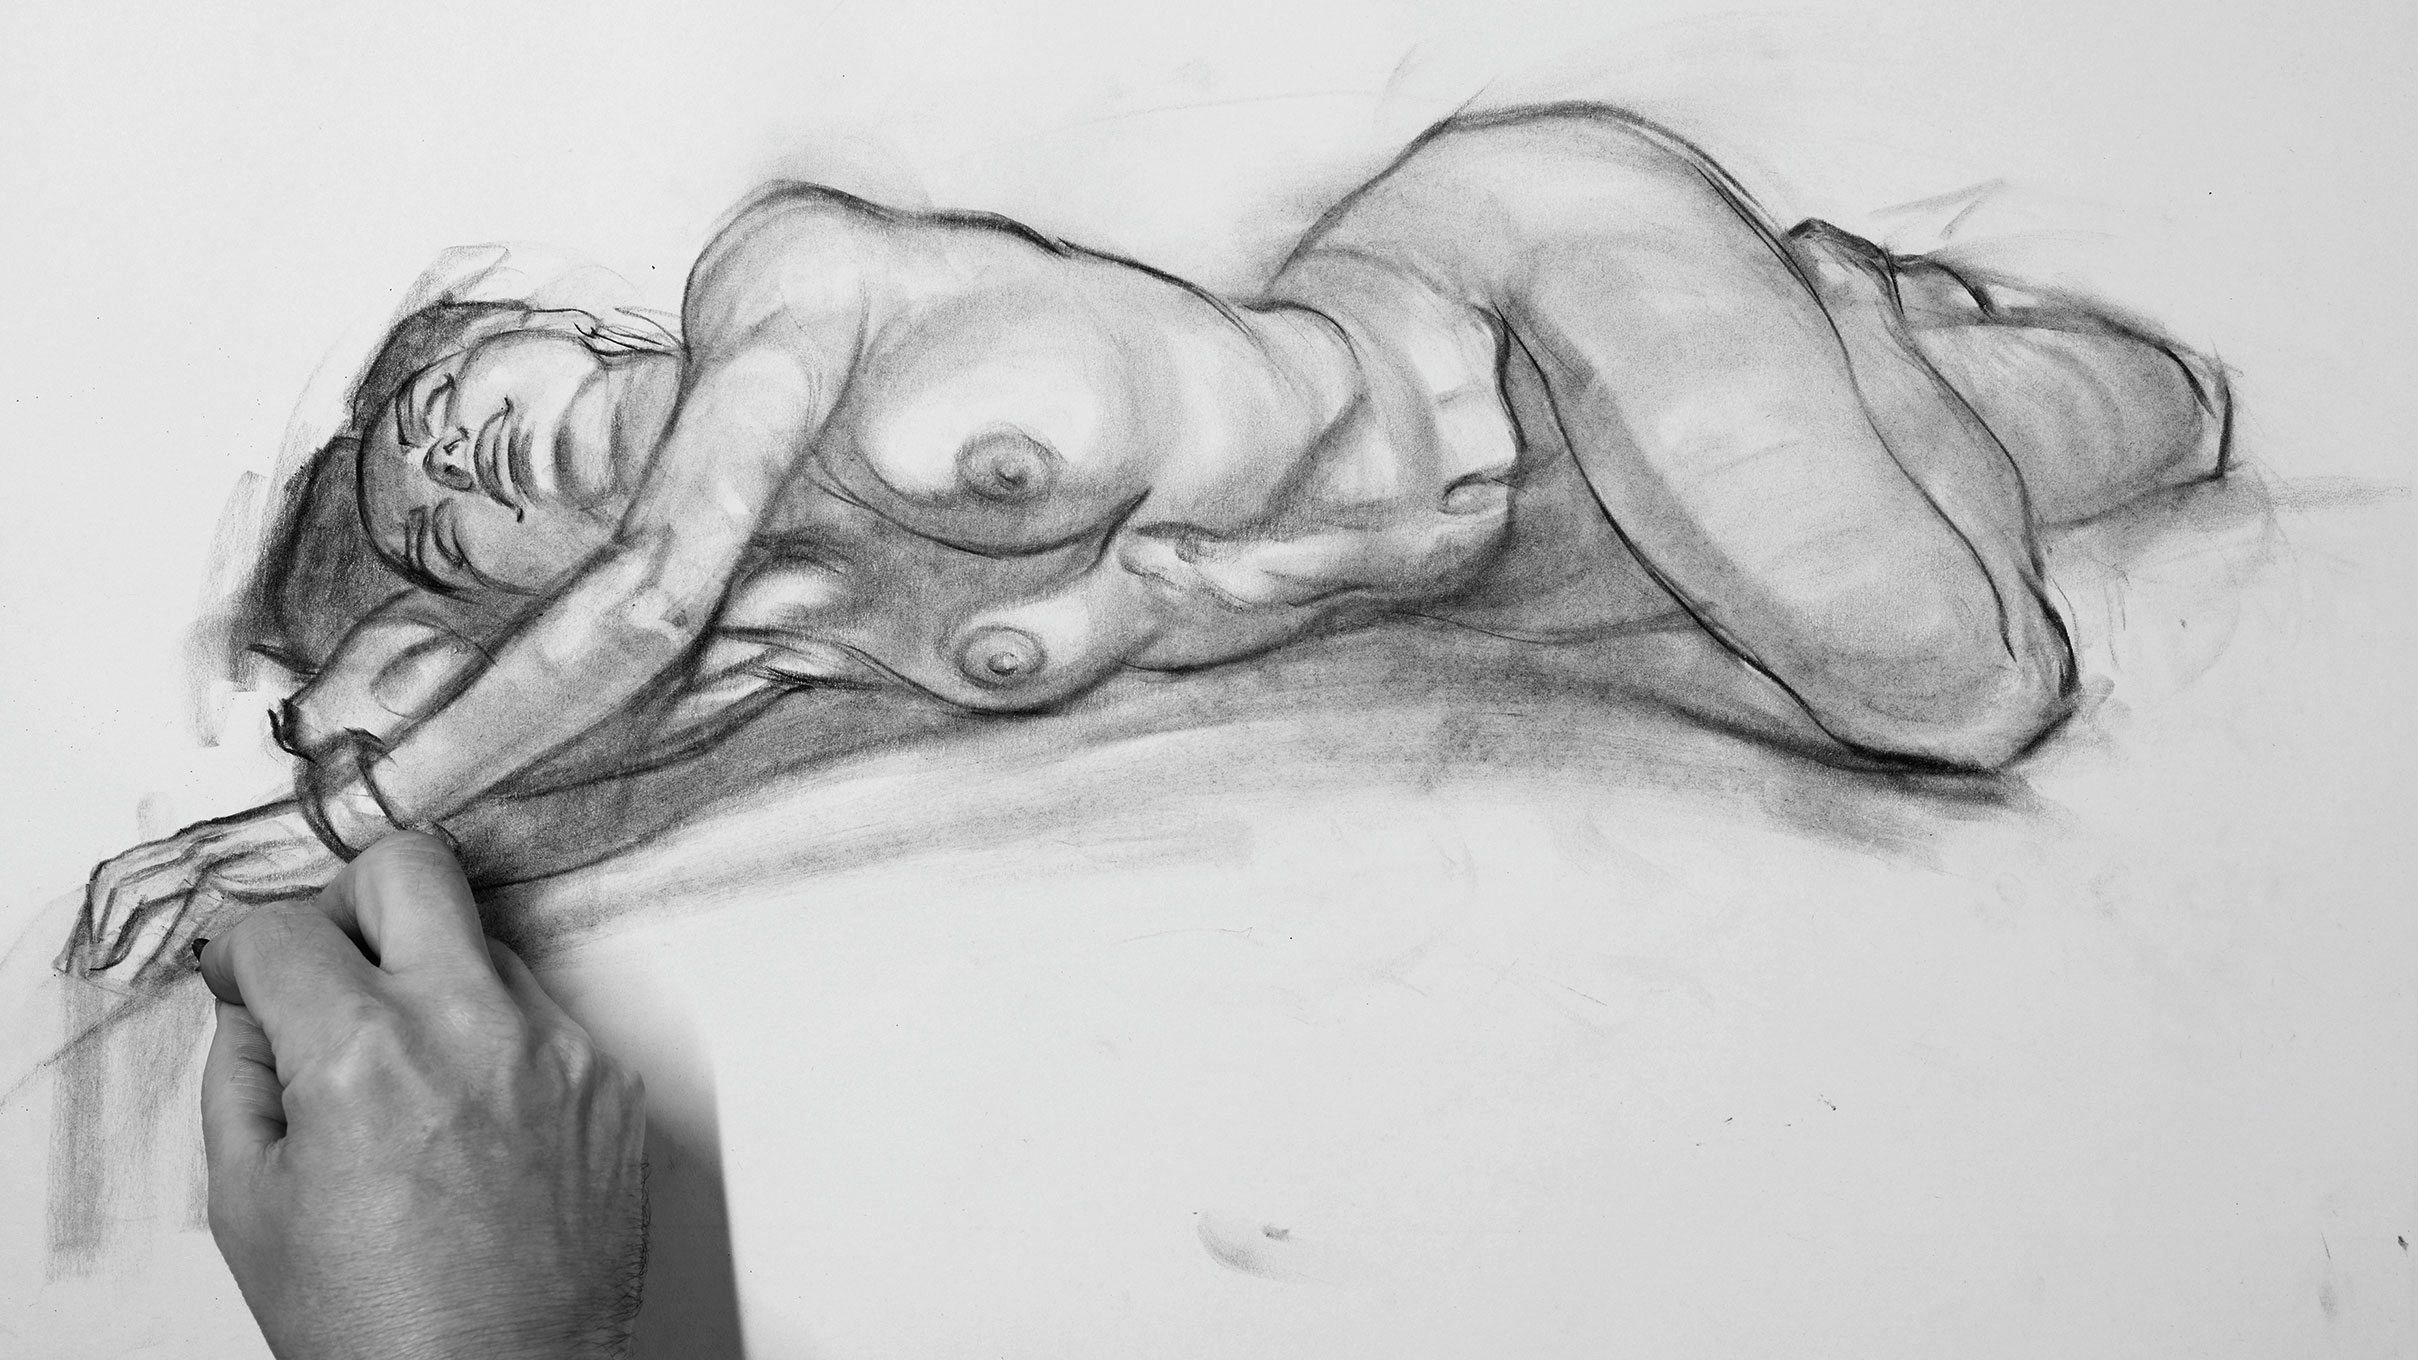
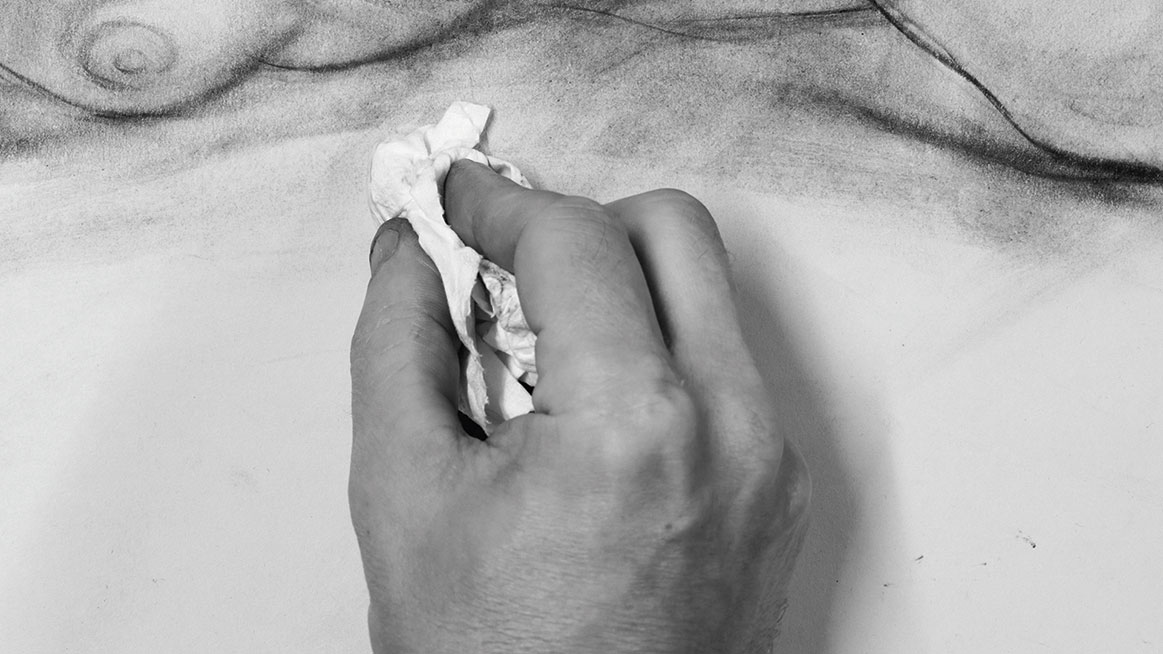
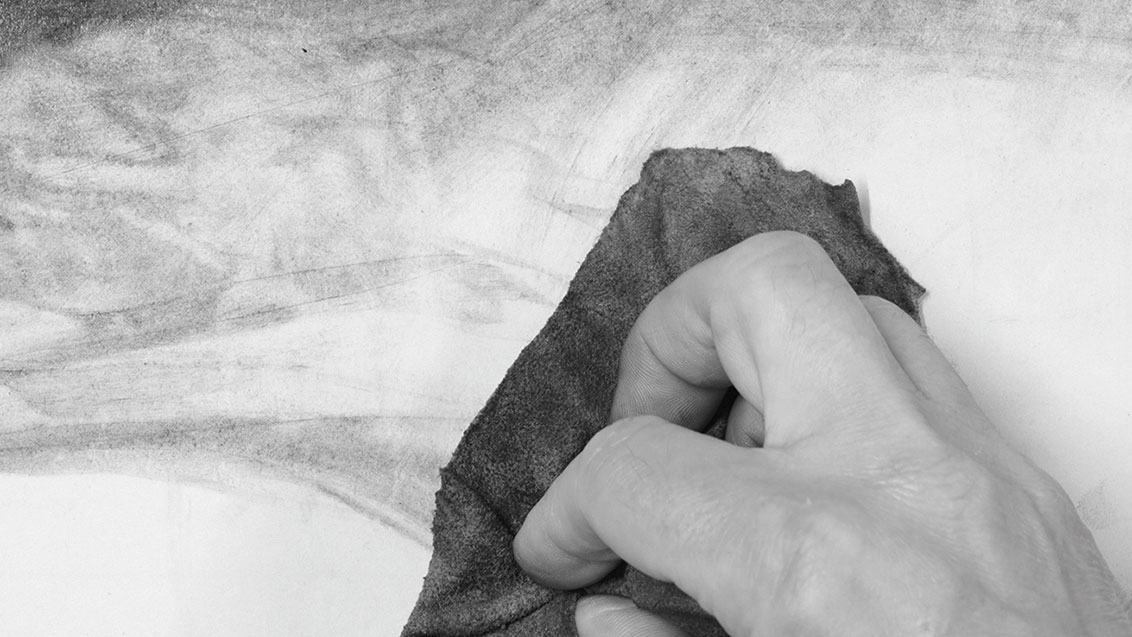
08. Use a paper stump for adjustments
Using a paper stump, I button around the charcoal that'south already on the paper rather than lay more charcoal down. This keeps the drawing light and fresh. I'm also mindful to ever be cartoon even when blending. I utilise a sheet of paper to forbid me smudging the drawing.
Struggling with to brand the medium piece of work for you? Check out our ten good tips for charcoal drawing.
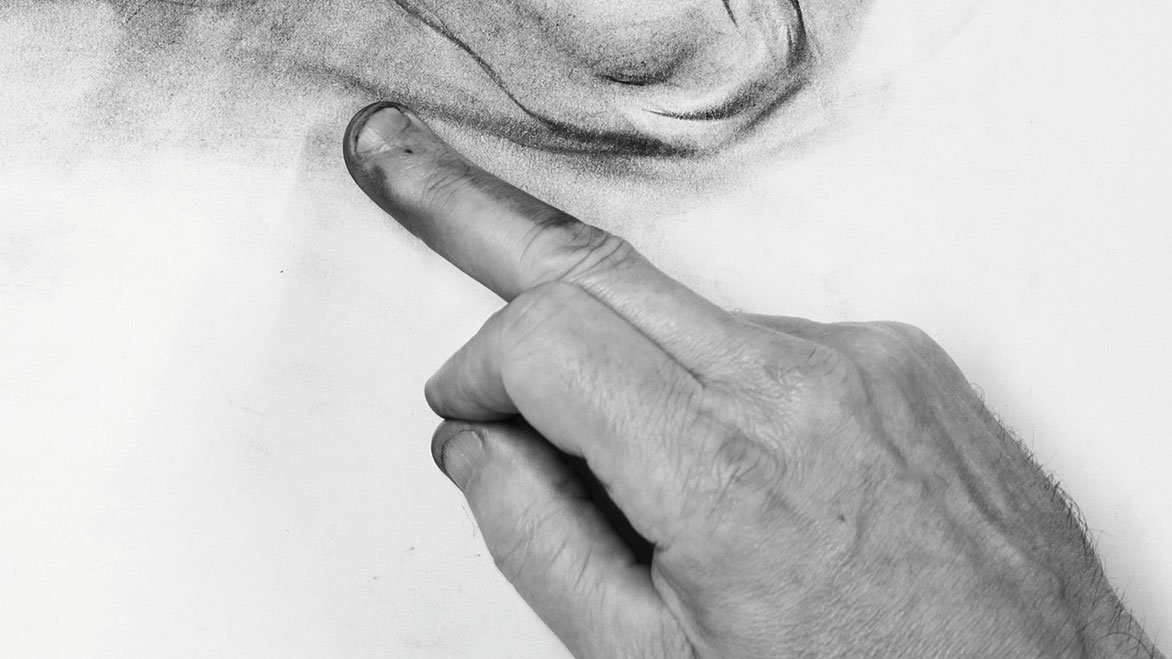
09. Create highlights with an eraser
I 'depict' highlights with a kneadable eraser. I think of the eraser as a drawing tool rather than a correction tool. Slowly does it, especially in the early stages. Drawing fast is a simulated economy – if we rush a cartoon then we inevitably spend well-nigh of our fourth dimension fixing mistakes.
x. Take a break
I accept a brusk coffee suspension away from the drawing and come up back with a fresh eye. A suspension helps me see the bugbears more than clearly when I return. I see the breasts are too close in shape while the lower rib cage is too smoothen. I make minor changes to both bugbears and am ready for the large finish.
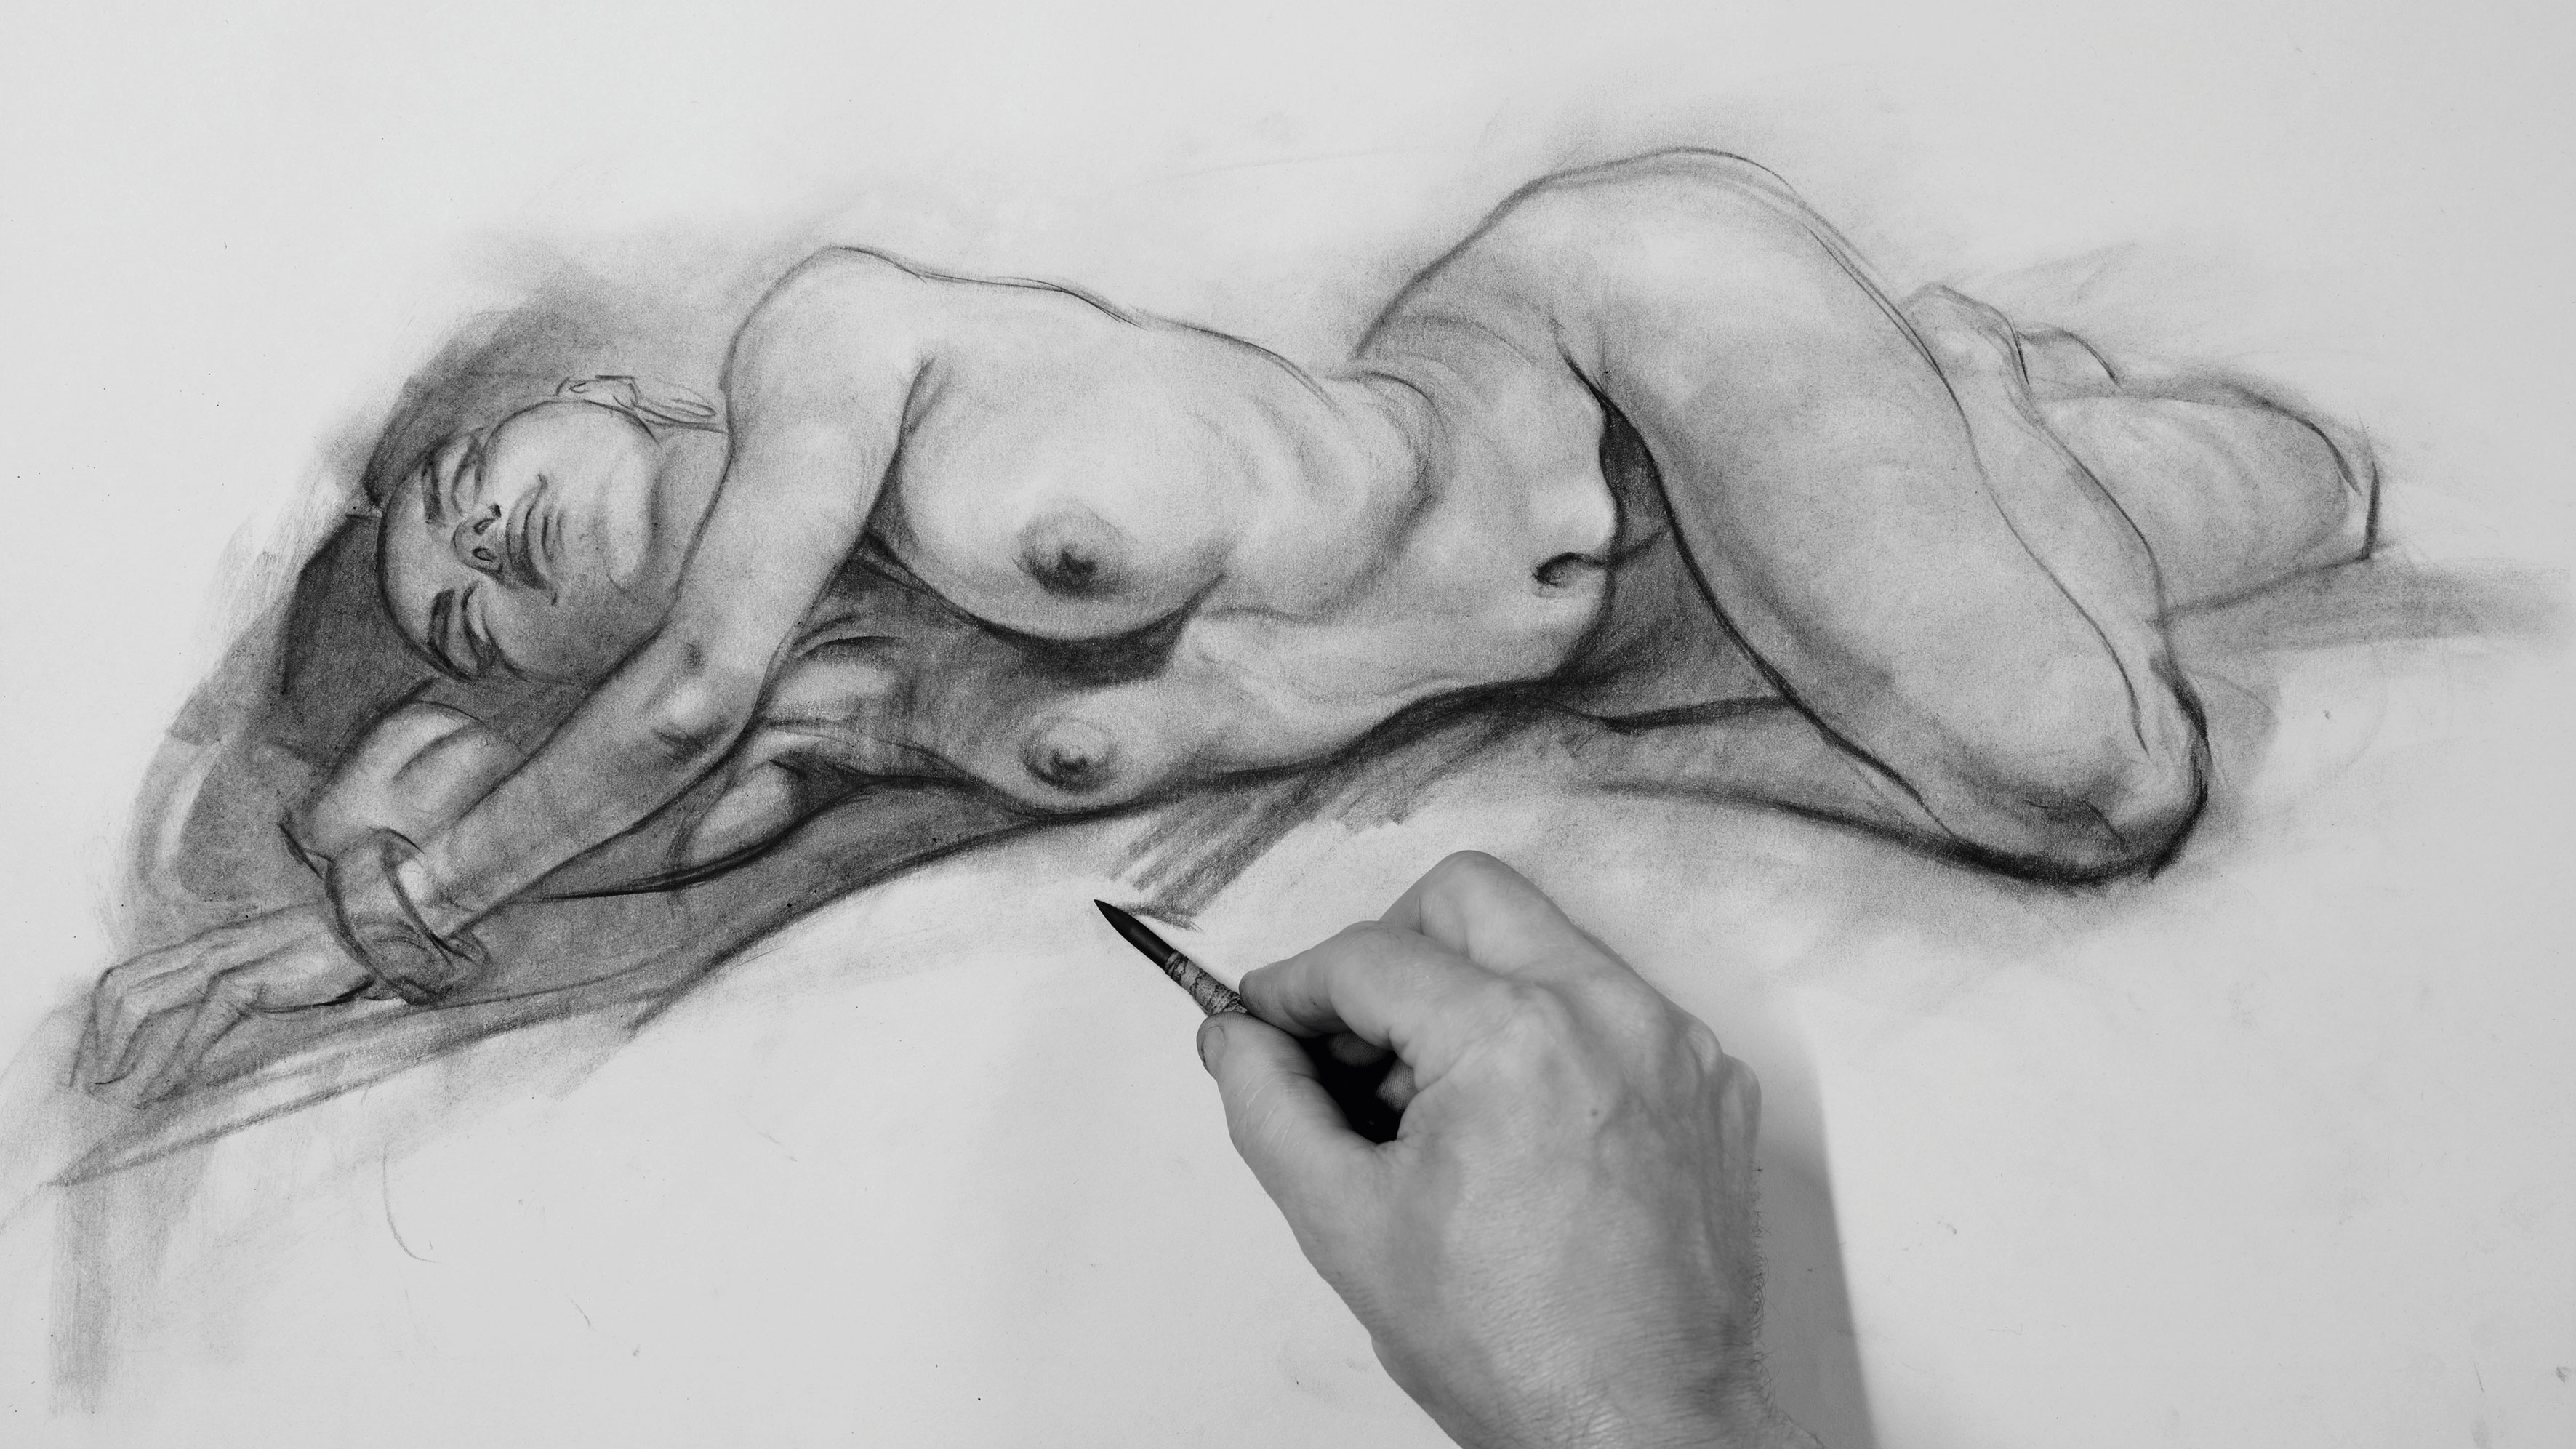
11. Add together in a background
I lay down a large swath of charcoal, then smudge it with a chamois leather fabric, playing with textures as I get. I learned of the chamois from Glenn Vilppu a few years dorsum and information technology's been function of my drawing armory always since. Hither I use it for abstract marks to ground the figure and add style.
12. Introduce the elements of fantasy
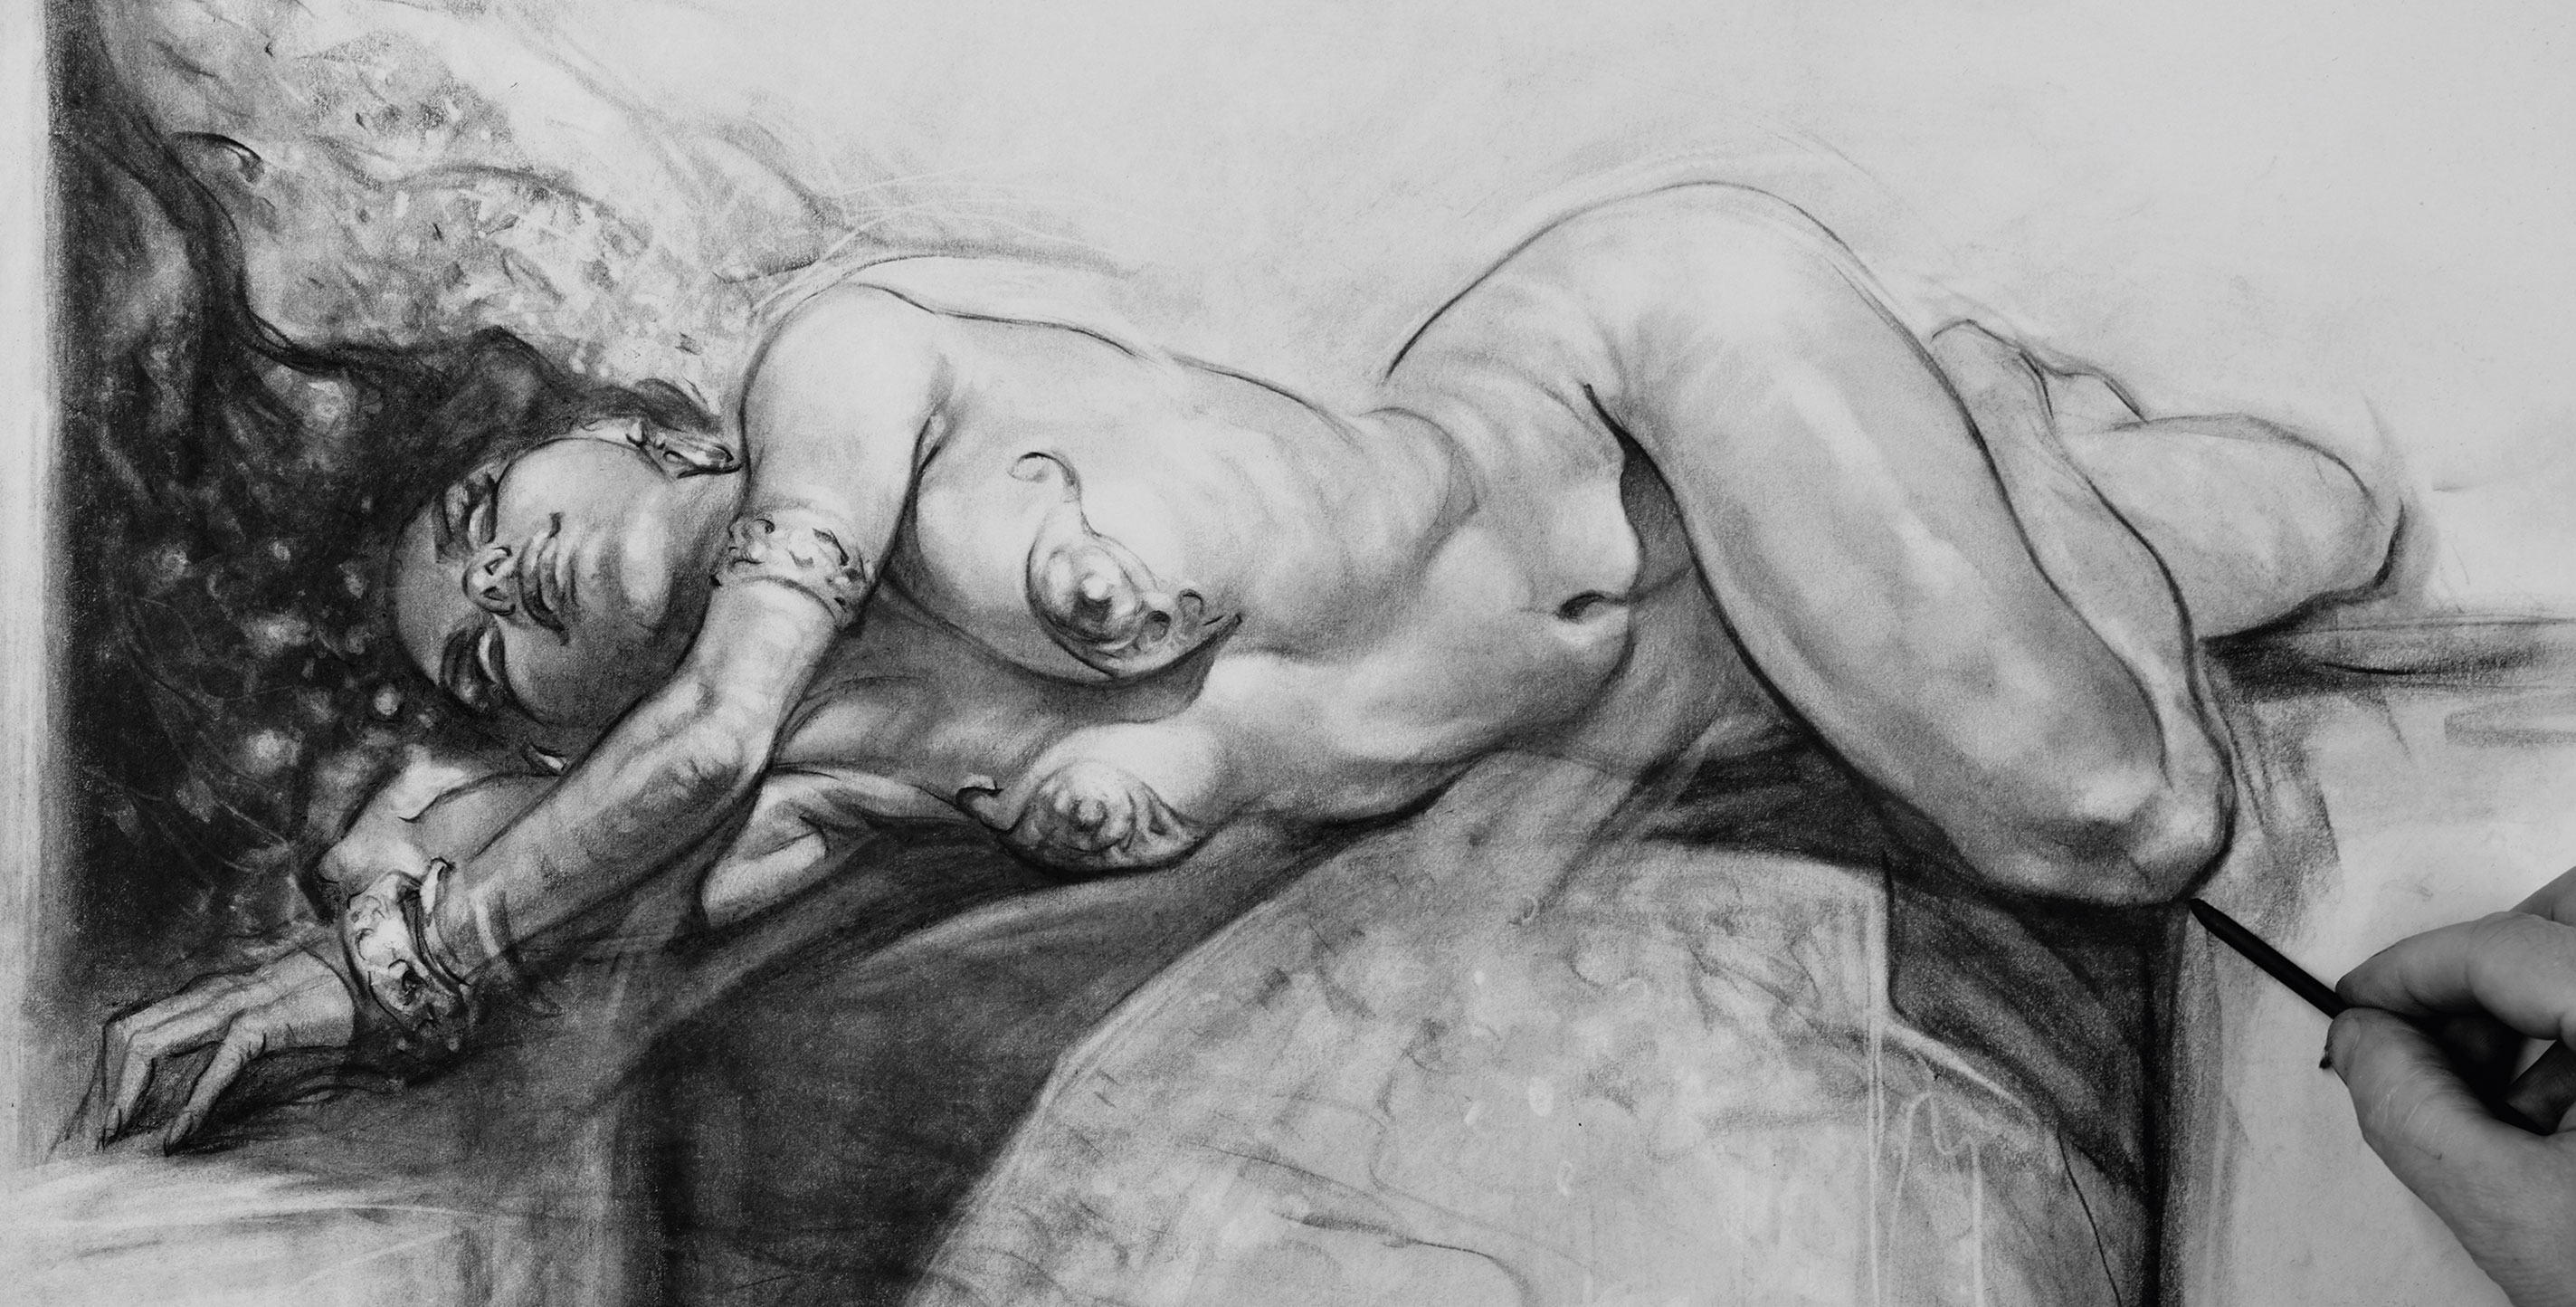
For my paradigm, I imagined a vampire in a bloodlust trance. With large charcoal sticks I draw abstract shapes and then pencil in the breast plates and jewellery using hard erasers for highlights.
Next page: How to draw a male effigy

Source: https://www.creativebloq.com/how-to/how-to-begin-a-figure-drawing
Posted by: hoglundthatounhould.blogspot.com
0 Response to "How To Draw The Male Figure"
Post a Comment